I’m going to show you on how to setup the Software RAID for FreeBSD. The Software RAID process in FreeBSD is a lot simpler compared to the previous CentOS, Debian, or Ubuntu Software RAID.
Please make sure before this installation, you will need 2 identical hard disk with same space connected to the server. But the truth is, you don’t need to same hard disk with the same space amount, but as long as you partitioned the space equally then it would be good as well. But for beginner, it is better to get a hard disk that got the same space quantity, less percentage that you would get yourself confused.
Below are the steps on how to setup the Software RAID on FreeBSD:
1) Follow the initial operating system installation here:
2) Before starting, we need to enable the additional debugging information, or you will end up unable to run the mirroring process by typing sysctl kern.geom.debugflags=17
3) Now we are going to start the process. The current hard disk is located in /dev/ad0 and the software RAID that we are going to create will be on /dev/mirror/gm0. So begin typing this to initiate the geom process gmirror label -vb round-robin gm0 /dev/ad0
4) You should see this message upon entering the code above:
Metadata value stored on /dev/da0.
Done.
5) Now we will initialize the geom by typing gmirror load When successful, the /dev/mirror directory will be created.
6) We need to make sure that the boot loader is installed to the new mirror. So type echo ‘geom_mirror_load=”YES”‘ >> /boot/loader.conf
7) Just in case, just make a backup copy of fstab by typing cp fstab fstab.bak Then we will start editing the fstab by typing vi fstab
8 ) Now change the current hard disk settings from /dev/ad0xxx to /dev/mirror/gm0xxx for example like the screenshot below:
Before

After

9) Once saved and done, reboot the server now by typing init 6
10) After the reboot is done, now we can add the 2nd hard disk into the mirror by typing gmirror insert gm0 /dev/ad1
11) Once added, you can always type gmirror status to view the synchronizing status:

12) When you see the message below, it means that the synchronizing process is complete:
![]()
13) You can check again the status by typing gmirror status

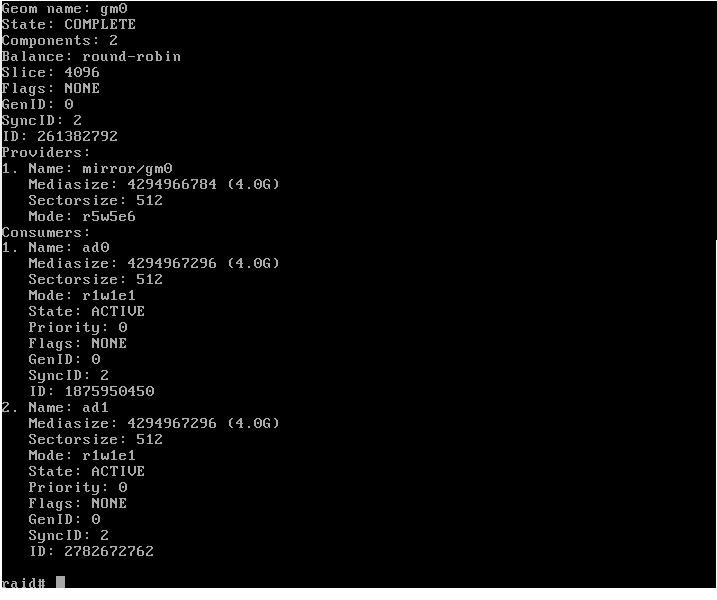
14) With this, your FreeBSD Software RAID setup has been done. You also can view the gmirror device list by typing gmirror list The result be be shown like below:
That is it. Your Software RAID now is ready for use. Happy Tryin 😉