This time around, I will show you how to configure the software RAID using Debian. This also can be applied to Ubuntu system as their are based on Debian platform anyway. As I mentioned earlier, the Software RAID configuration can be quite troublesome and time consuming, but at least it is reliable and save a lot of cost when buying a hardware RAID instead.
For a normal installation of Debian or Ubuntu, you can refer to the links below for initial steps until the hard disk partitioning:
Please make sure before this installation, you will need 2 identical hard disk with same space connected to the server. But the truth is, you don’t need to same hard disk with the same space amount, but as long as you partitioned the space equally then it would be good as well. But for beginner, it is better to get a hard disk that got the same space quantity, less percentage that you would get yourself confused.
Below are the steps on how to configure the Software RAID:
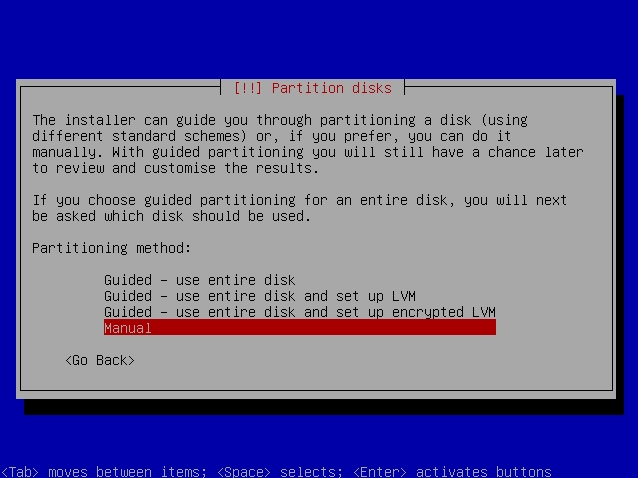
1) Select the Manual for the Partitioning Method:
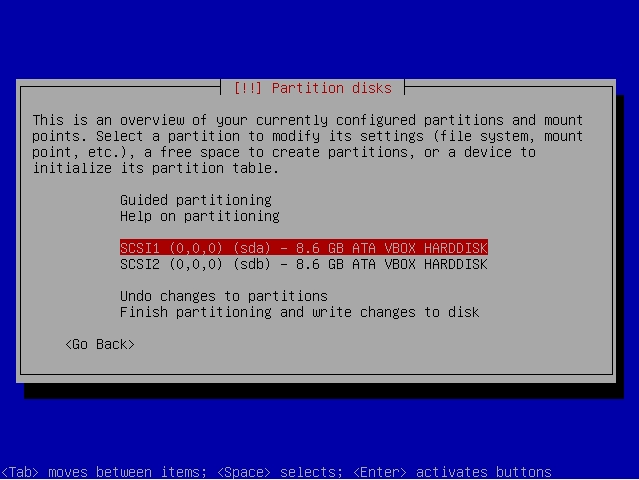
2) On this screen, it will show you the available hard disk for the installation. Make sure both hard disks are visible. Now select the first hard disk and hit Enter:
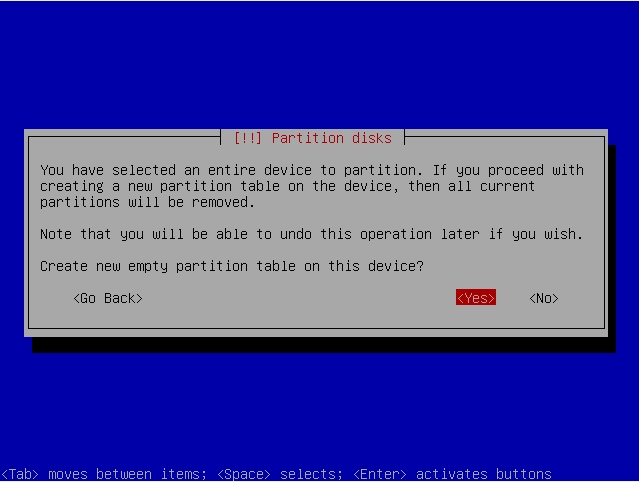
3) A message will warns you that you are about to create a new partition that will destroy any existing partition. Choose Yes to proceed:
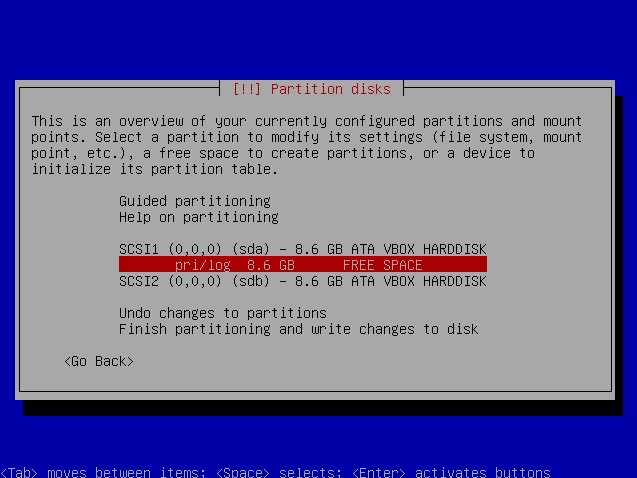
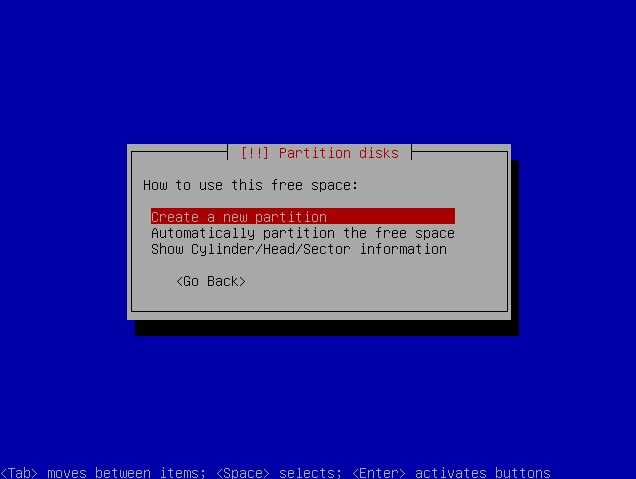
4) You will noticed that it will create a new partition at the bottom of the hard disk. Choose the new partition and hit Enter:
5) Select the Create New Partition:
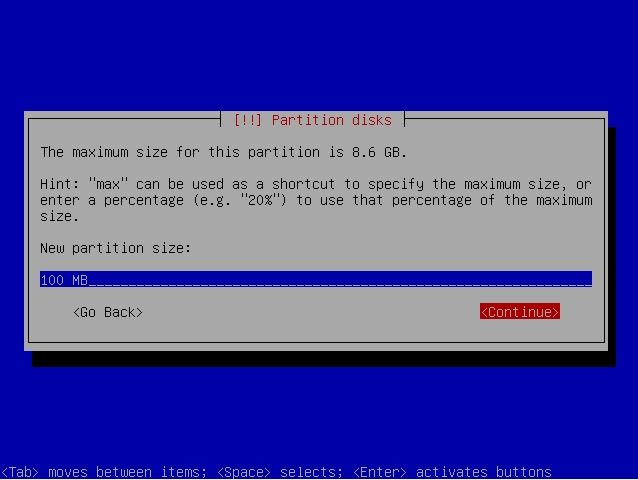
6) Since we are creating the partition for boot, just type 100 MB in the line:
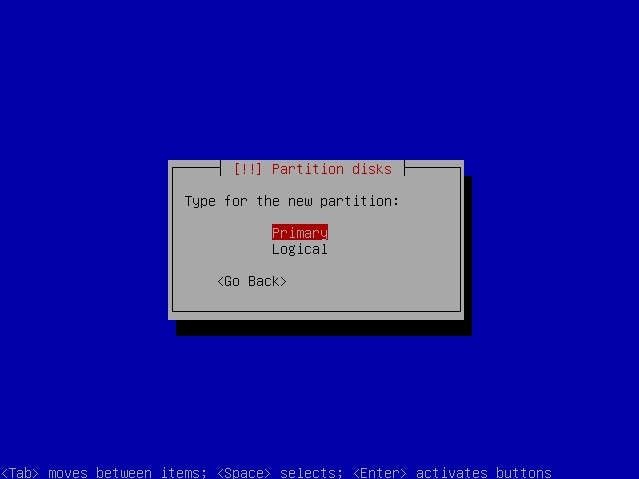
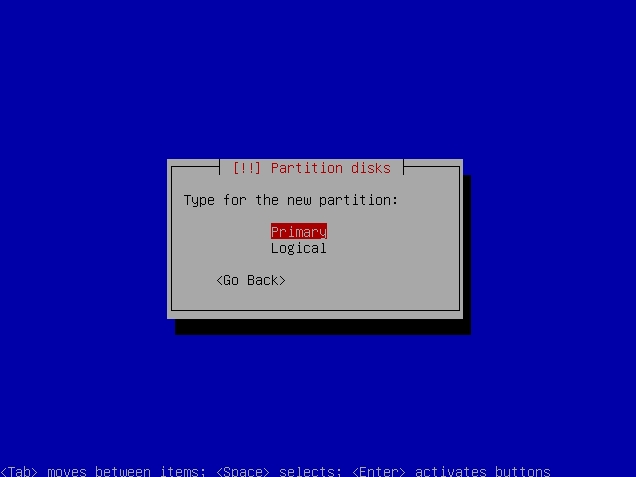
7) Choose the Primary partition:

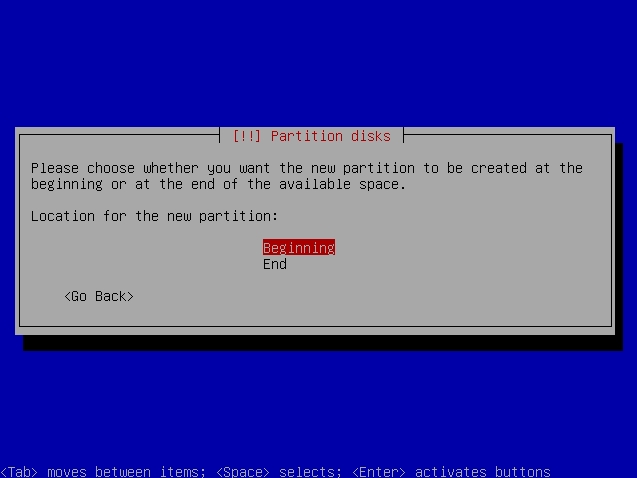
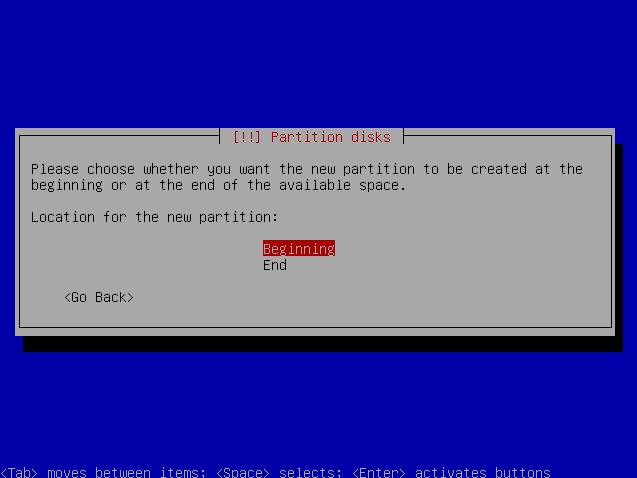
8 ) Choose to create new partition at the Beginning of the space:
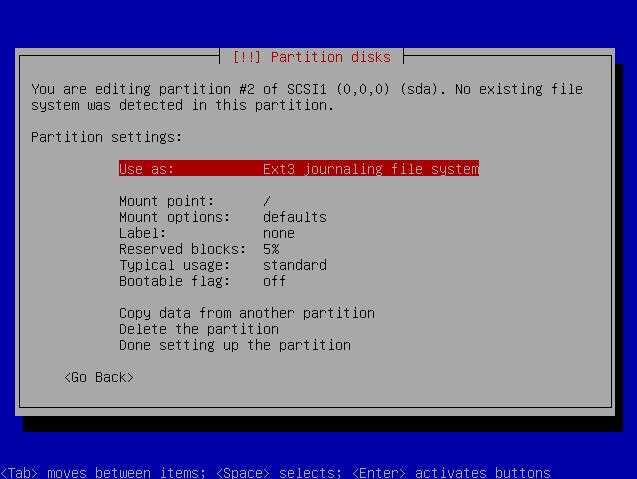
9) On this screen, move you selector to Use As and hit Enter:

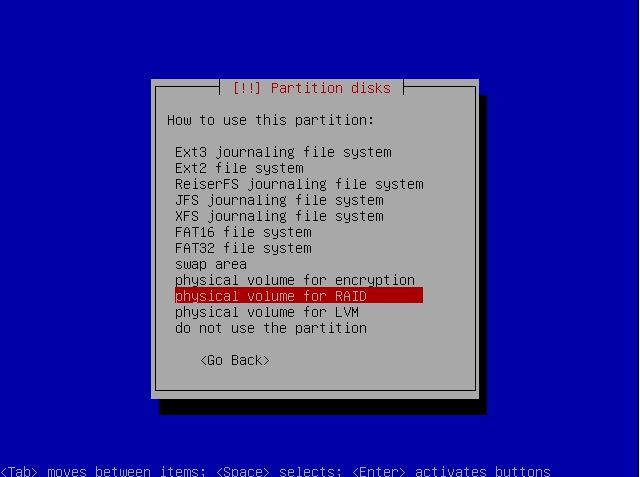
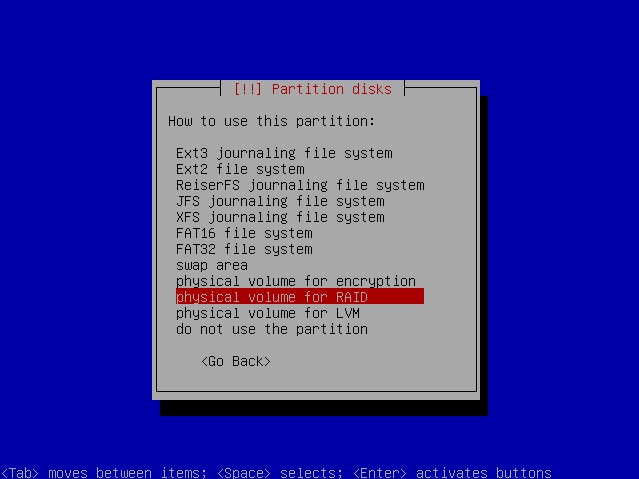
10) Please choose the Physical Volume For RAID option:
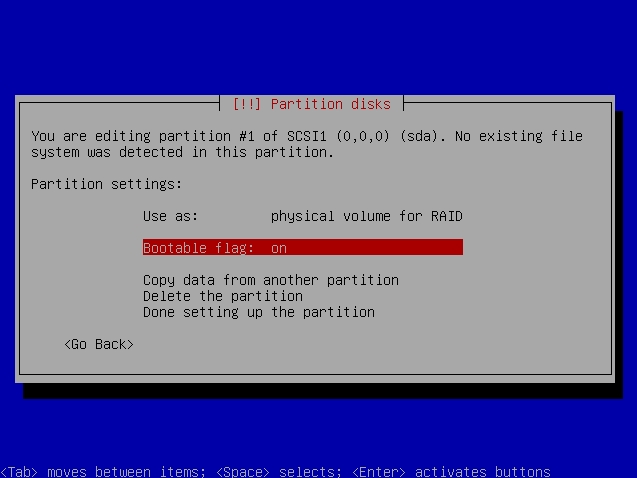
11) Please make sure that the Bootable Flag is tuned On:
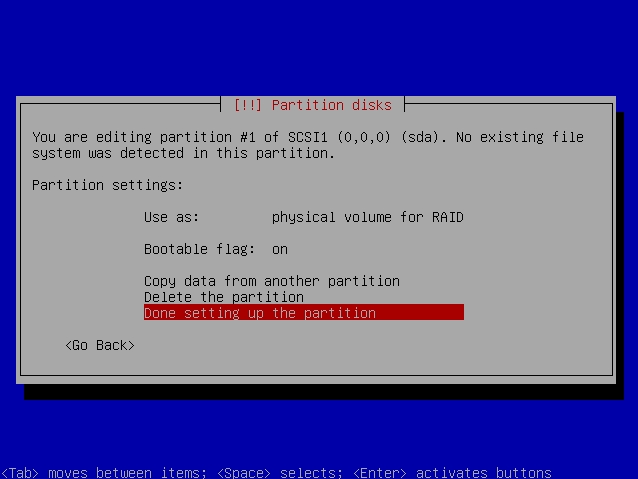
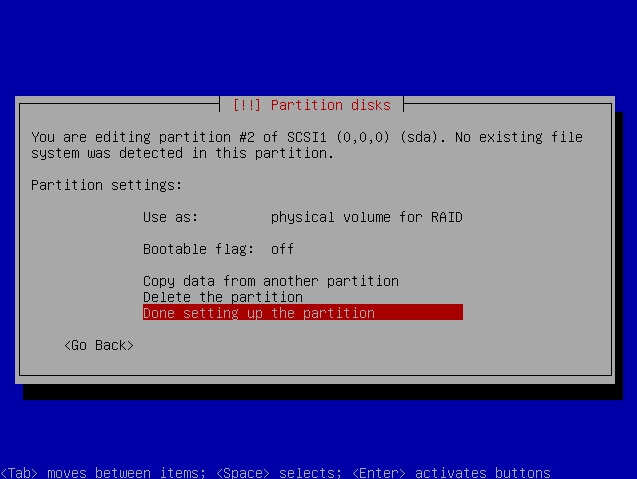
12) Choose the Done Setting Up The Partition to save the new partition:
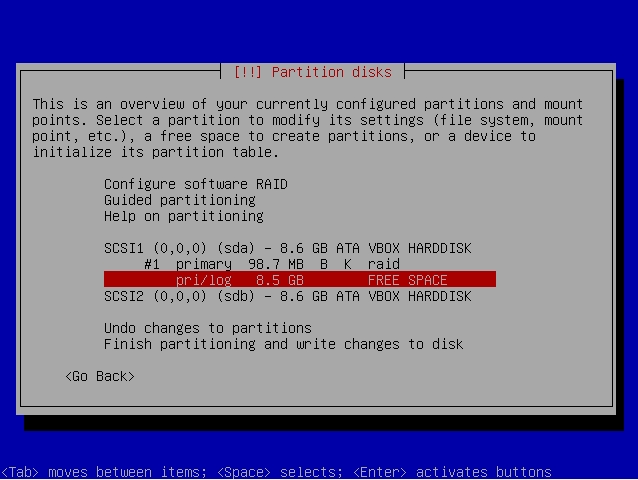
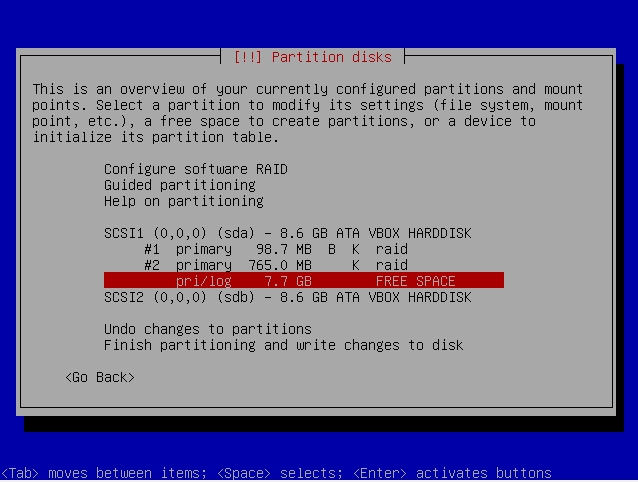
13) You will be taken back to the first screen. Next is to choose the next free space and hit Enter:
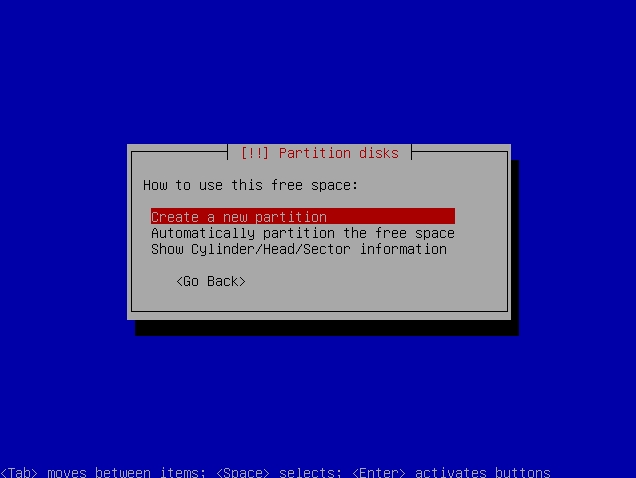
14) Select the Create A New Partition:

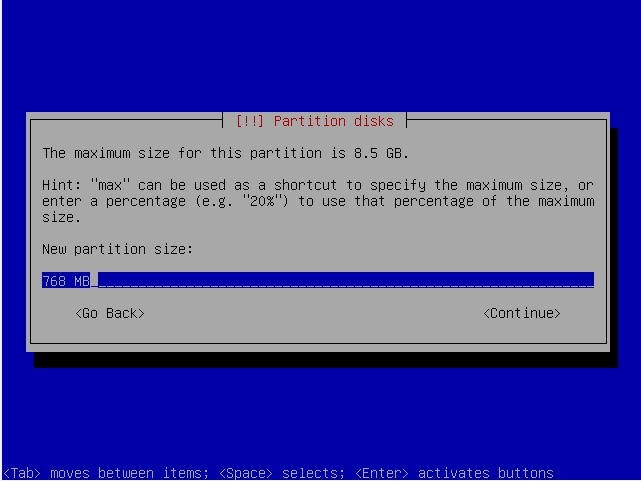
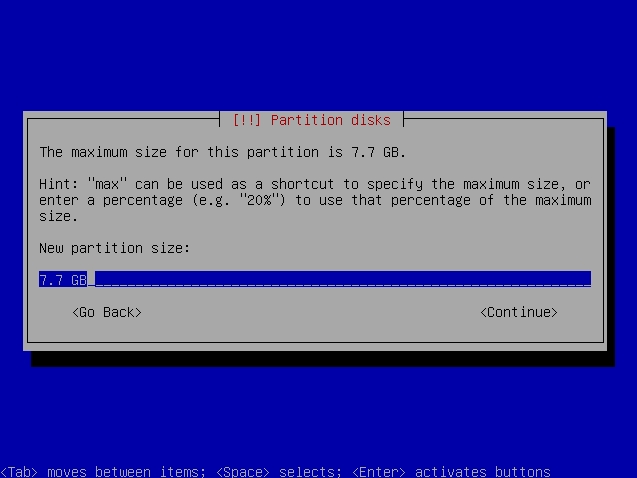
15) Now we are adding the new partition for the Swap. Please take note that always make sure that the Swap size is double the amount than your physical RAM. Since my physical RAM was only 384MB, so my swap size should be set as 768 MB in the box:
16) Select the Primary option:
17) Select the Beginning option:
18 ) On the next screen, move your selector to the Use As and hit Enter:
19) Select the Physical Volume For RAID option:
20) After that, just straight away select the Done Setting Up The Partition to complete:
21) Back to the original screen, select the another free partition again and hit Enter:
22) Select the Create A New Partition option:
23) Now we are creating the partition for root. So just use all the leftover hard disk space:
24) Select the Primary option:
25) Move the selector to Use As and hit Enter:
26) Select the Physical Volume For RAID and hit Enter:

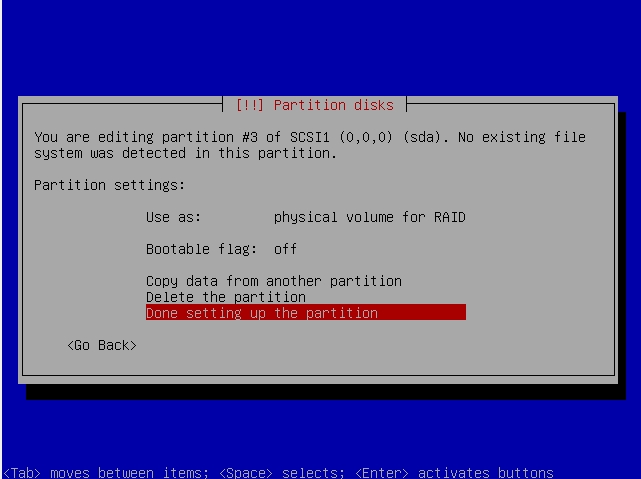
27) After that, just straight away choose the Done Setting Up The Partition:
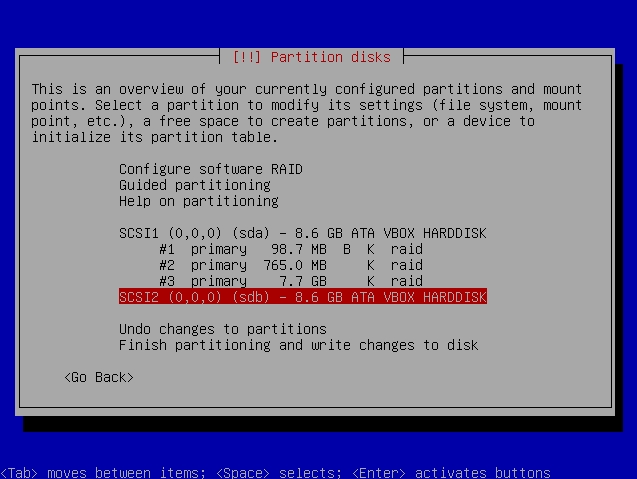
28 ) Now moving on to the second hard disk for the partitioning. Hit Enter and please follow the Step 3 – 27 to do the same partitioning with the 2nd hard disk:
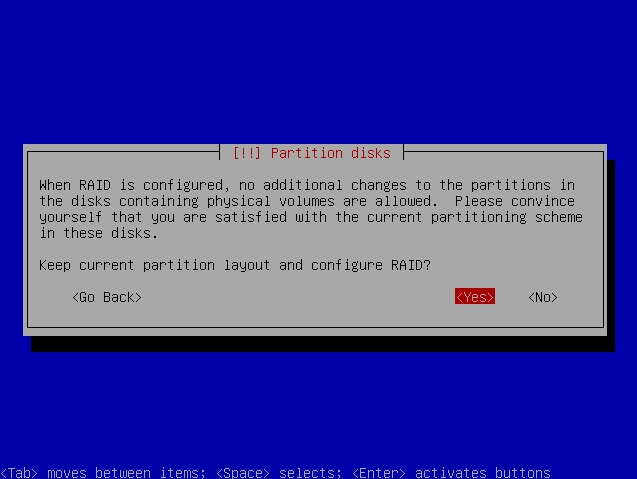
29) After the 2nd hard disk has been partitioned, the overall partition configuration will look exactly like the bottom. Each space in each partition will reflect to each other in the 2nd hard disk. So now move the selector to Configure Software RAID and hit Enter:

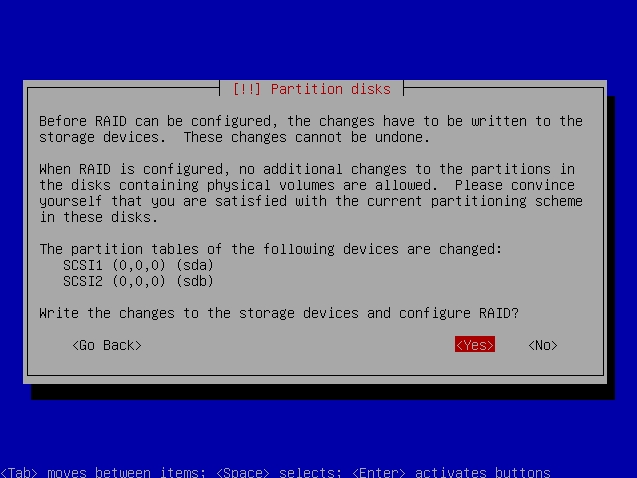
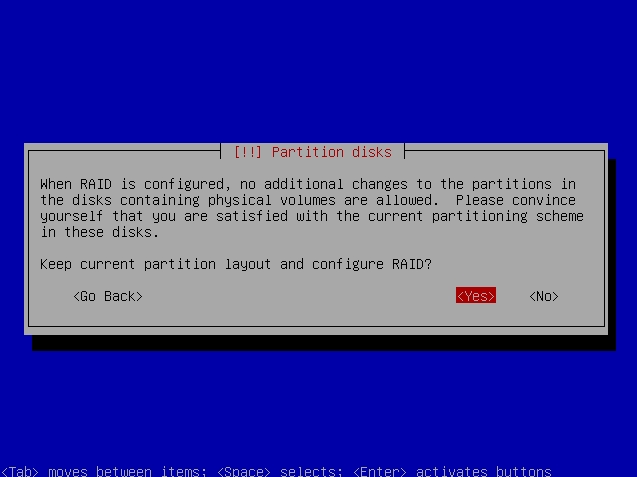
30) Select Yes to accept the new partition changes:
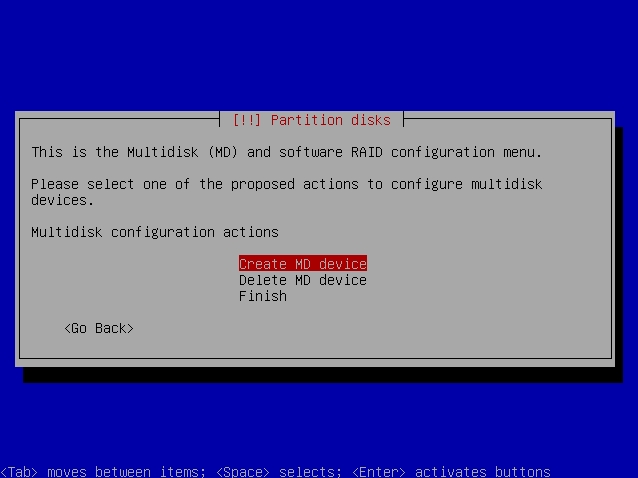
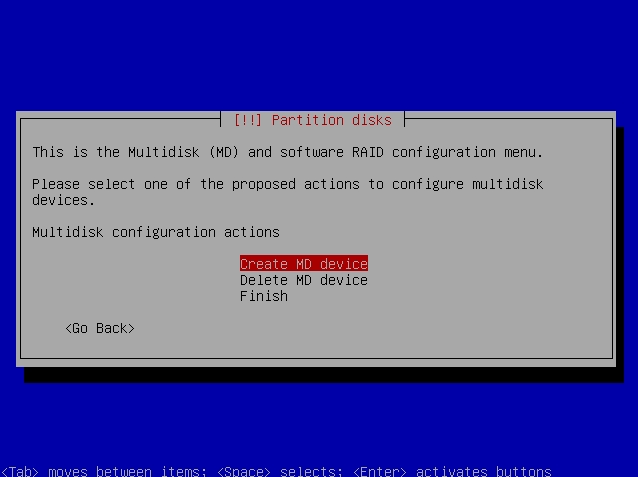
31) Now we will group the RAID hard disk. Select the Create MD Device option:
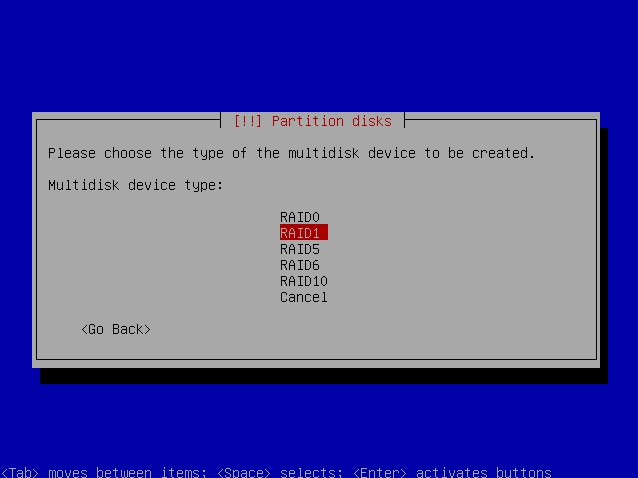
32) Choose your preferred RAID method. For now, we are going to choose RAID1:

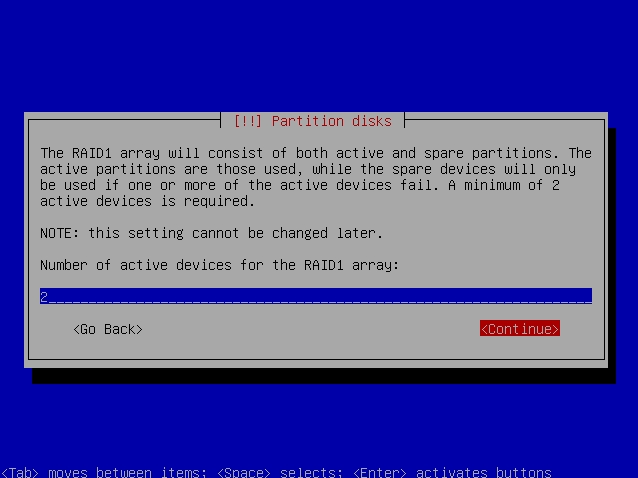
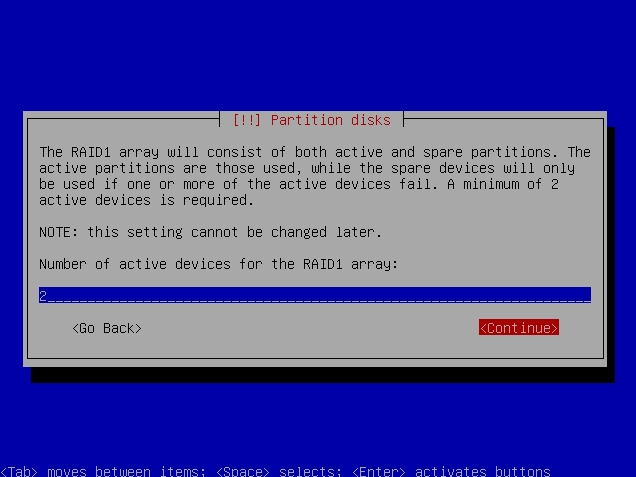
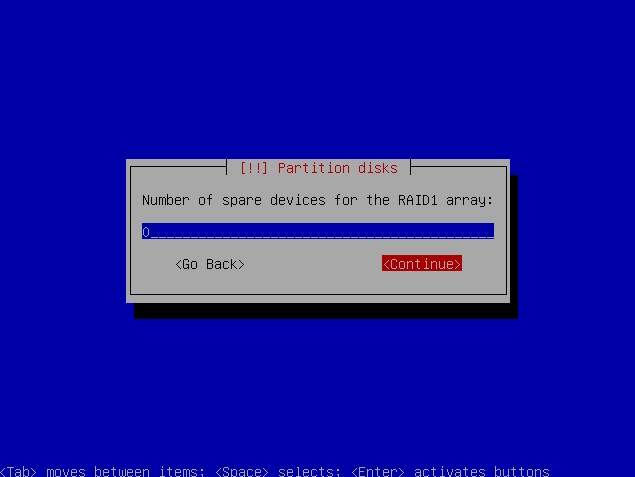
33) Just leave the default number 2 for the number of RAID devices. This option may varies depending on which RAID type you selected:
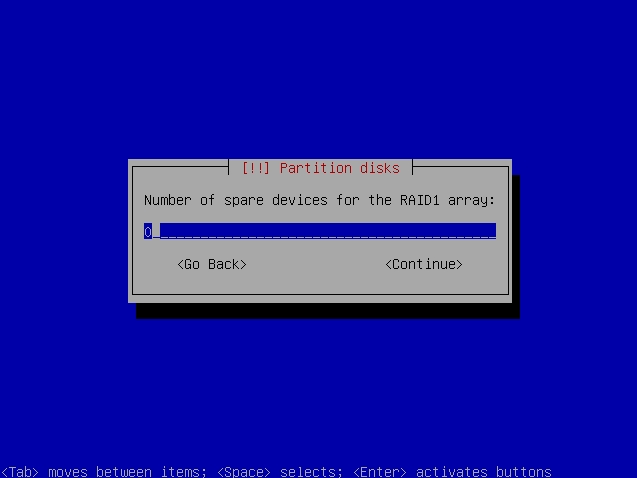
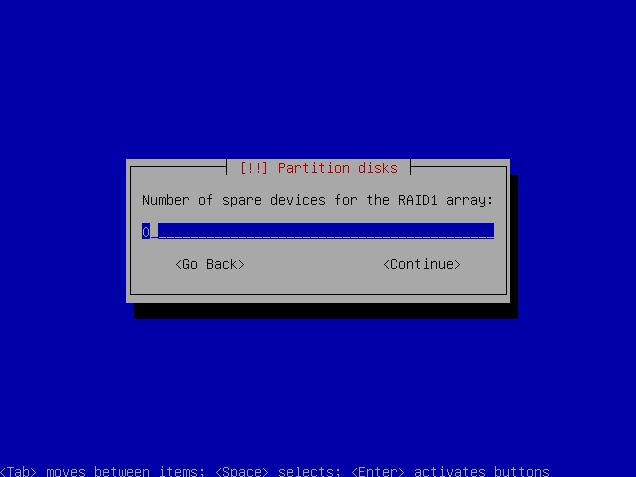
34) Just leave it zero if you don’t put up any spare hard disk for your RAID:
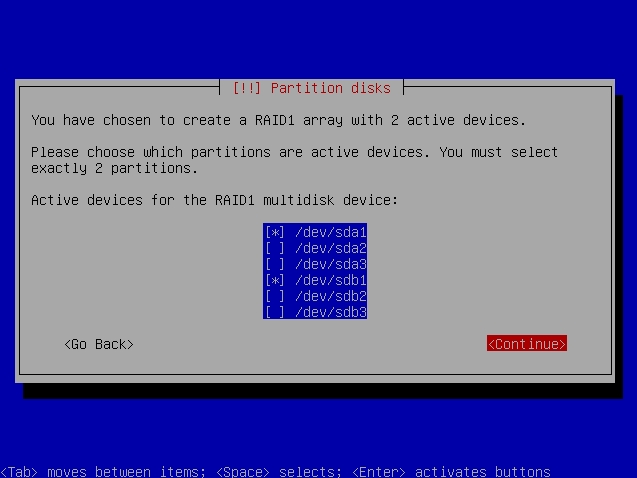
35) Now select the SDA1 and SDB1 as we are creating the RAID for /boot:
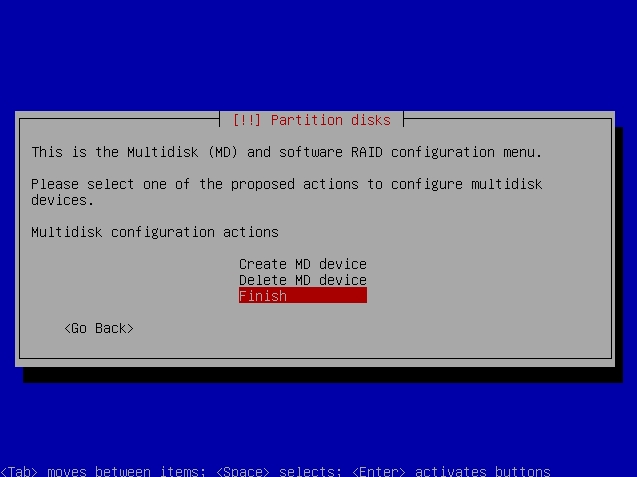
36) When it has been done, choose the Finish to save the new RAID partition:
37) Now we are proceeding with the 2nd RAID partition. Choose the Configure Software RAID and hit Enter:

38 ) Select Yes to proceed with the RAID configuration:
39) Choose the Create MD Device option:

40) Choose the RAID1 option:

41) Just leave the default value of 2 RAID active devices and proceed:
42) Leave the default value of zero for the RAID spare array unless you know what you are doing:
43) Now select the SDA2 and SDB2 for the Swap partition purposes:
44) Select the Finish to complete the setting for the Swap partition:
45) Now we proceed with the /root partition setup. Choose the Configure Software RAID and hit Enter:
46) Select Yes to proceed with the RAID partition setup:
47) Choose the Create MD Device option:
48) Choose the RAID1 setup:
49) Just leave the default value of 2 for the active RAID devices:

50) Leave the default value of zero for the spare RAID devices:
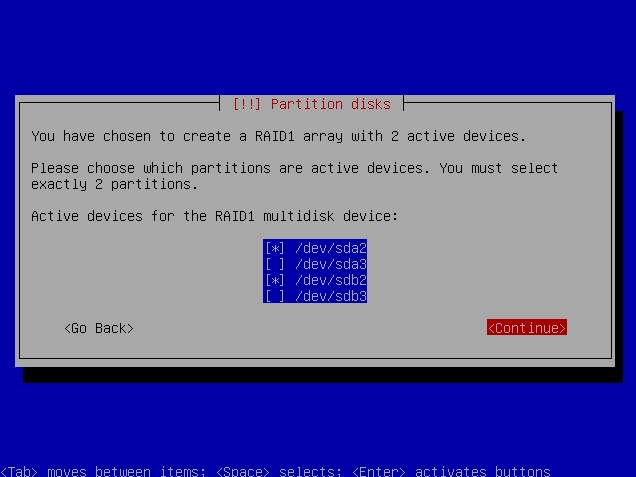
51) Now select the remaining partition for /root space which are SDA3 and SDB3:
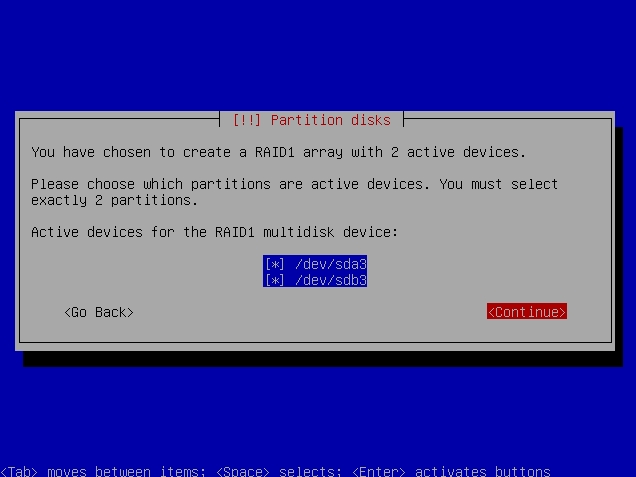
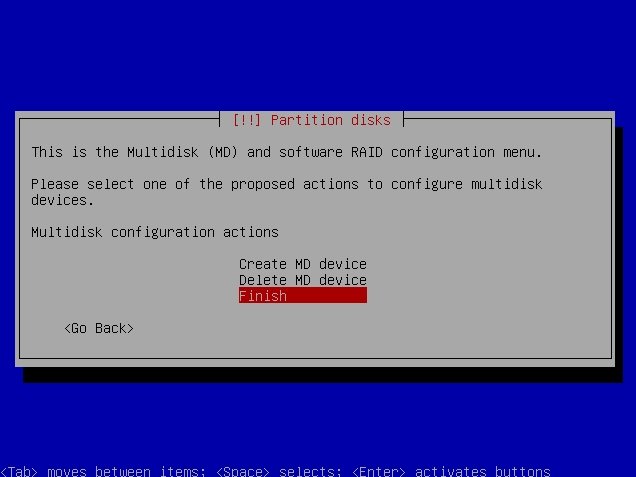
52) Soon after, just choose the Finish to complete the setup:

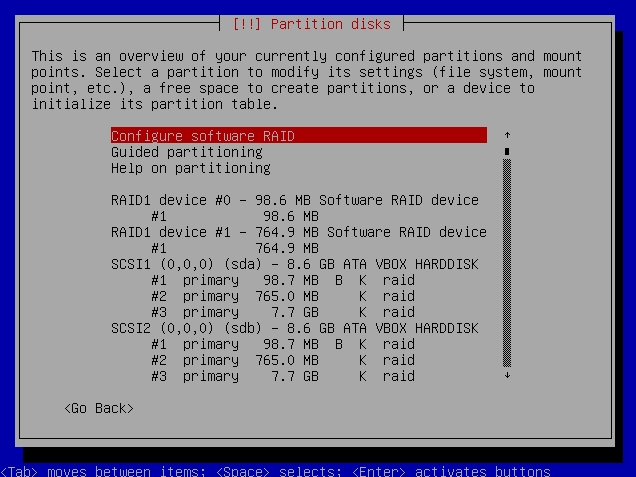
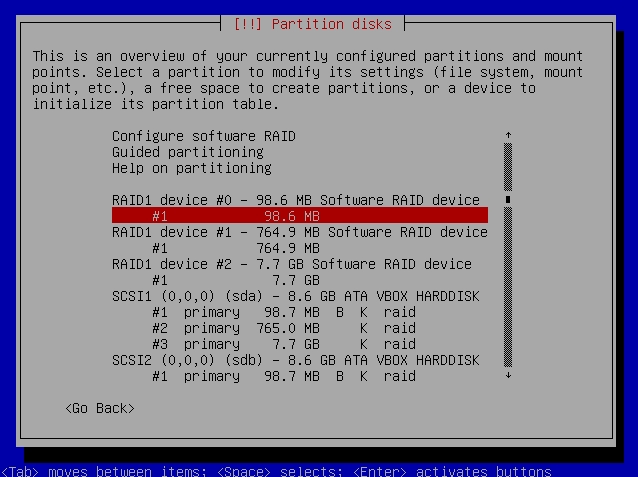
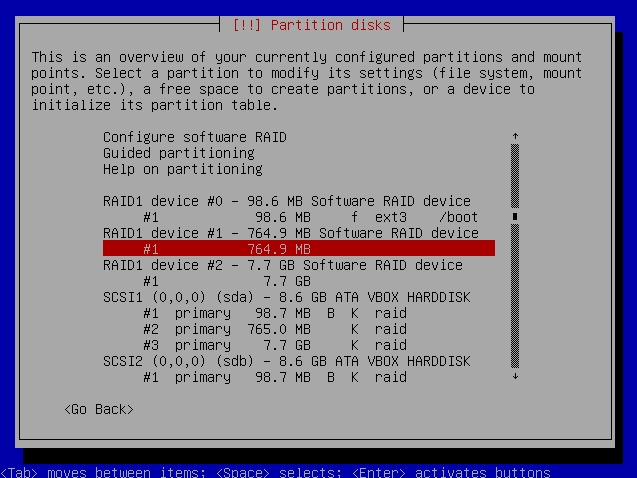
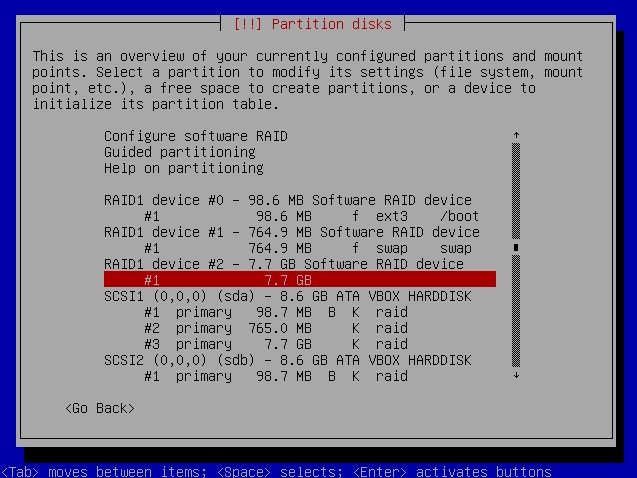
53) Now the initial software RAID is completed like the below picture, what’s left is to assign each RAID partition its role. Now select the RAID partition Device #0 for /boot setup:
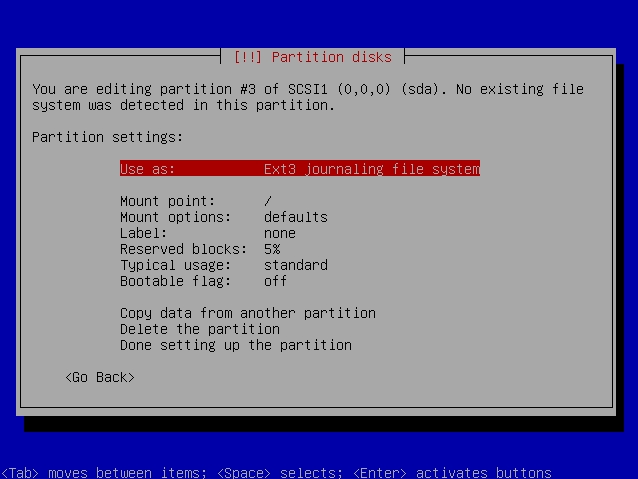
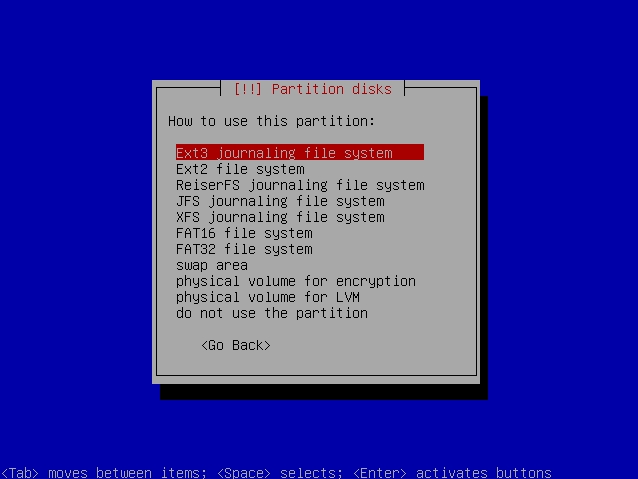
54) Choose the Use As and hit Enter:

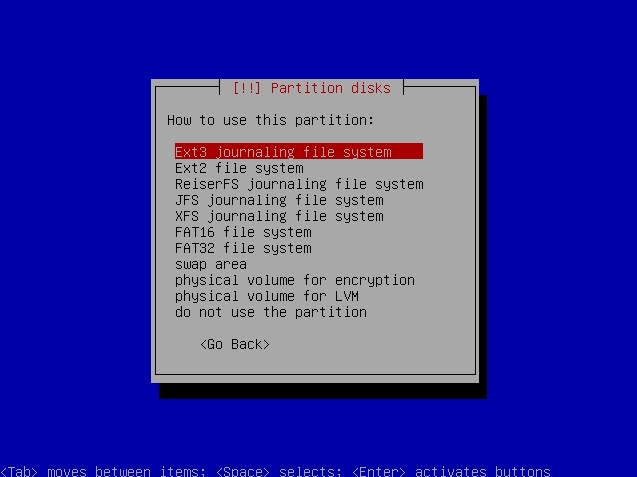
55) Choose the EXT3 Journaling File System (or EXT4 for Ubuntu) and hit Enter:
56) Now move the selector to the Mount Point and hit Enter:
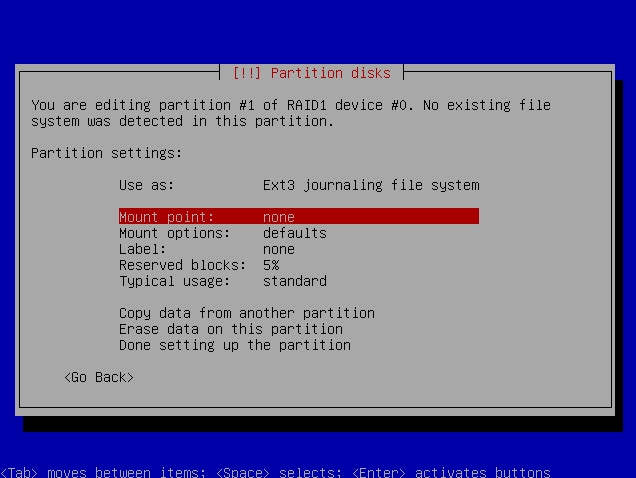
57) Now select the /boot and hit Enter:
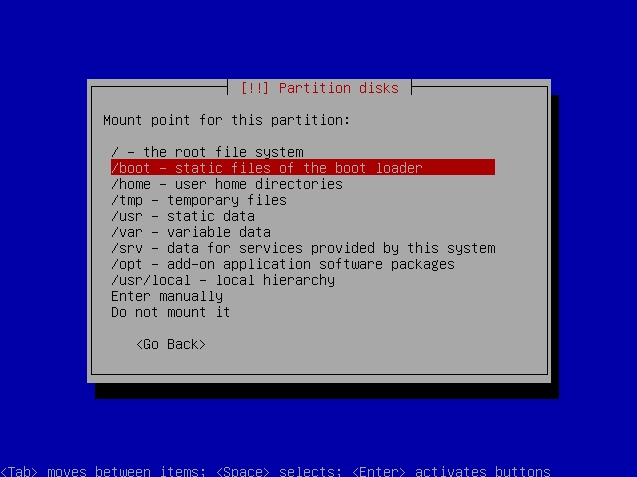
58) Select the Done Setting Up The Partition to complete the /boot partition setup:

59) At the first screen again, now select the RAID Device #1 and hit Enter:
60) Move the selector to the Use As and hit Enter:
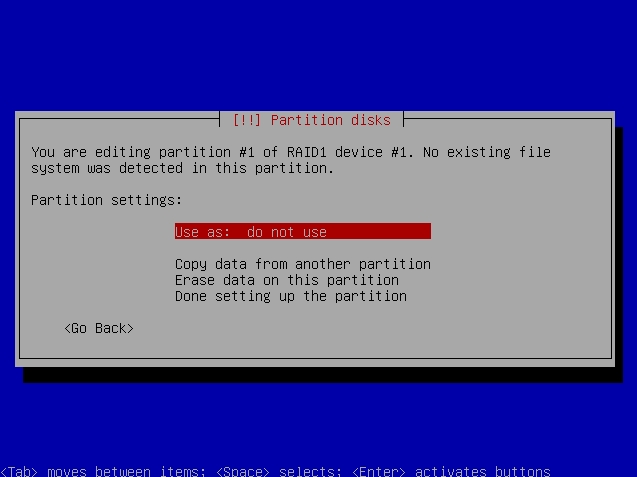
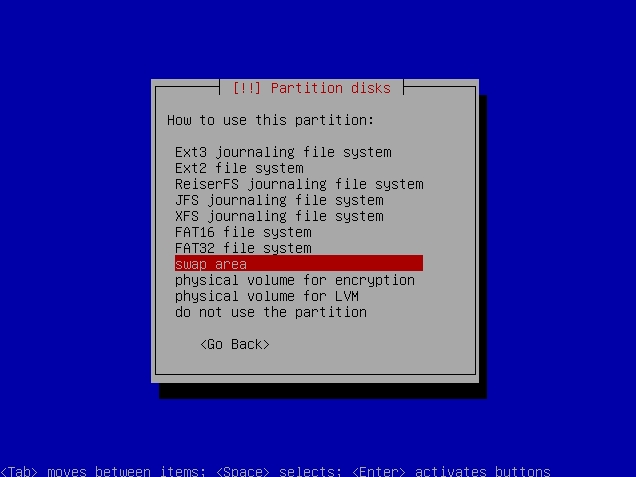
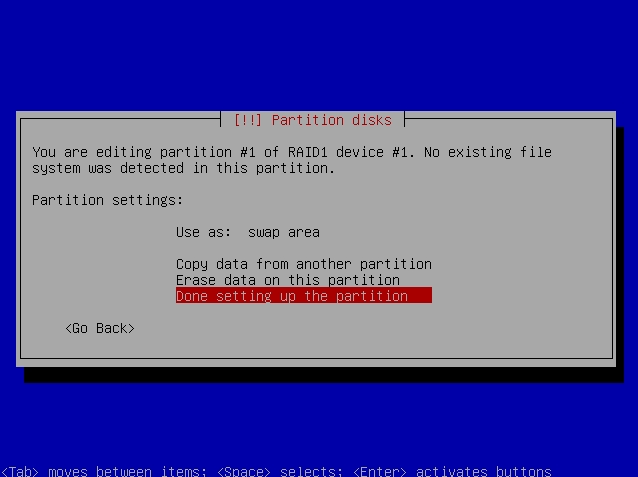
61) This time we are going to create a Swap partition for the operating system. So select the Swap Area and hit Enter:
62) Just straight away select the Done Setting Up The Partition soon done:
63) Now is to edit the last partition of the RAID which is meant for /root. Select the RAID Device #2 and hit Enter:
64) Move the selector to the Use As and hit Enter:

65) Select the EXT3 Journaling File System and hit Enter:
66) Now move the selector to the Mount Point and hit Enter:
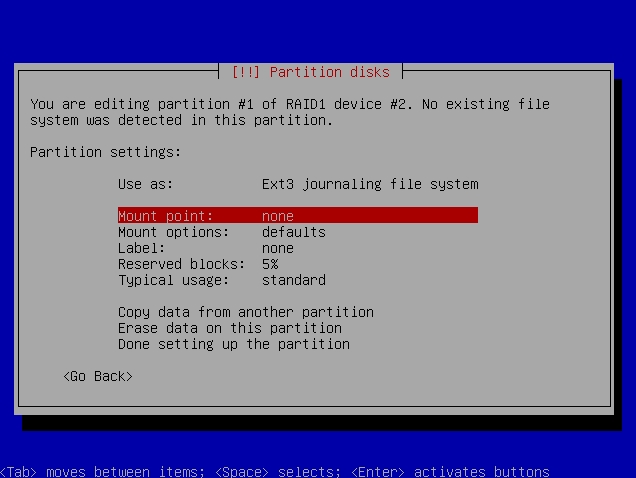
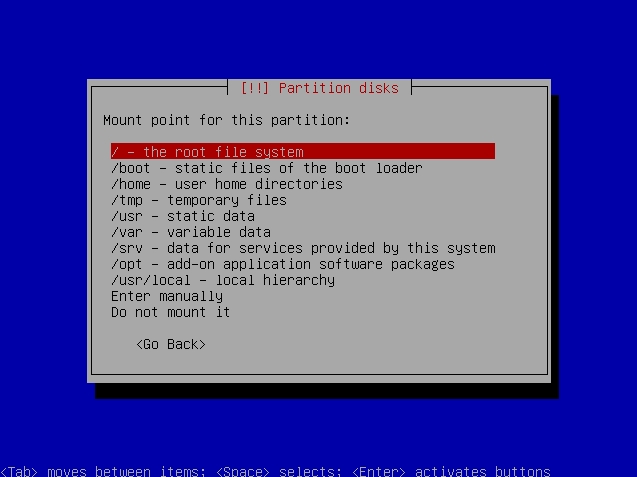
67) Select the / – The Root File System and hit the Enter:
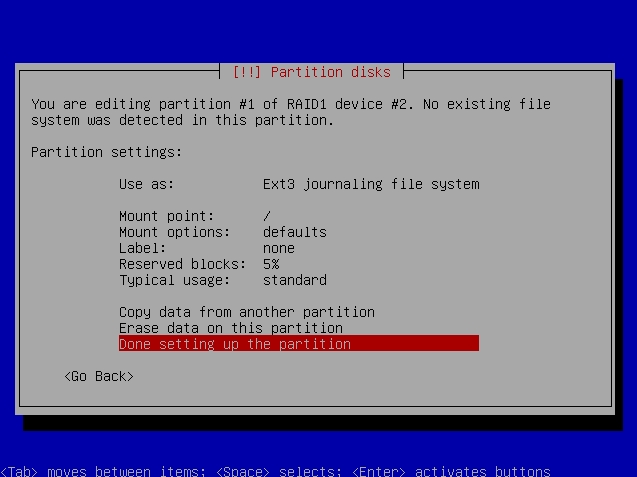
68) Finally select the Done Setting Up the Partition to complete the procedure:
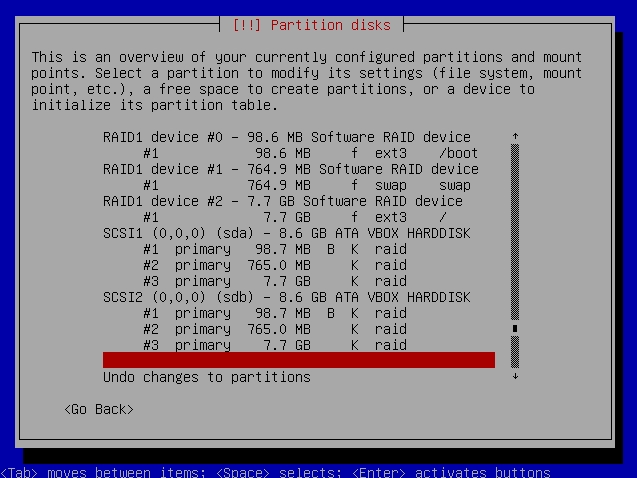
69) The final outlook of the partition should be like below. Once confirmed, move the selector to the most bottom of the screen to select the Finish Partitioning And Write Changes To Disk and hit enter:
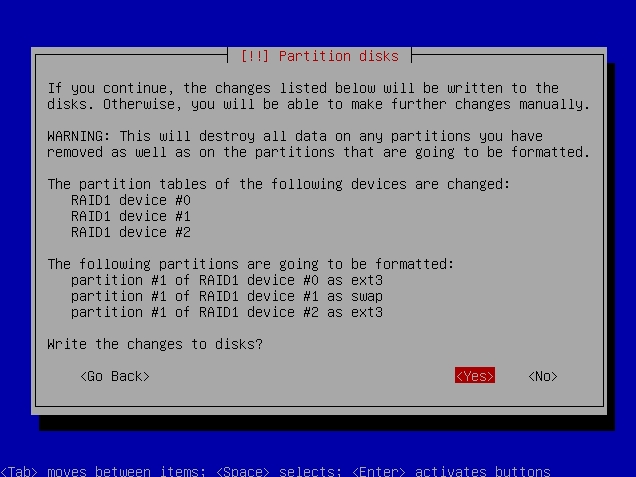
70) Just press Yes if you confirmed the partitions:
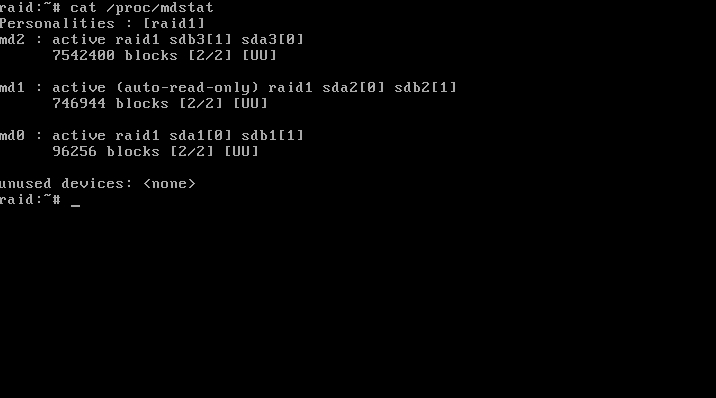
71) Then just follow the normal installation procedure. Once the server has been rebooted, log in as root and type cat /proc/mdstat to view the RAID status:
72) By default, the GRUB boot loader only were installed in one of the hard disk only. If you forgot this step, your second hard disk can’t boot by itself. You need to copy the GRUB from the SDA to SDB. Just type grub and follow like below, line by line:
device (hd0) /dev/sda
root (hd0,0)
setup (hd0)
device (hd1) /dev/sdb
root (hd1,0)
setup (hd1)
73) For Ubuntu users version 9.10 and above, the system will install the boot loader in both partition during setup as long as you enabled the Boot from Degraded Disk option.
74) Please take note that the software RAID will be running under MDADM. This is a software that being developed to handle the RAID procedure inside the server. You can type mdadm –help for further information
The server’s software RAID should be running fine now. Happy trying 😉
Hello,
THANK YOU for the detailed instructions. I have learned a LOT from them. However, I still have issues.
In Step 12, you have the bootable flag set on. That makes sense, but my install will not allow me to set it to ‘on’ for ‘Physical Volume for RAID’.
If I configure the partitions as Ext3 I can set the bootable flag to ‘on’.
However, when I get the RAID complete, and continue the install, it fails to load GRUB2, because it is trying to install to /dev/sda instead of /dev/md0. I do not see an opportunity to tell it otherwise.
Any ideas?
Thanks
i believe you are suing a different version of Debian than I did when doing this tutorial